
We have updated our EPP Dashboard!
In this document is a breakdown of the newest features we have added to our EPP dashboard. This is not intended to be a fully comprehensive guide but instead an overview of the newest features available. We’d be happy to offer a full demonstration and training on our EPP Dashboard; simply reach out to set up a time convenient for your team!
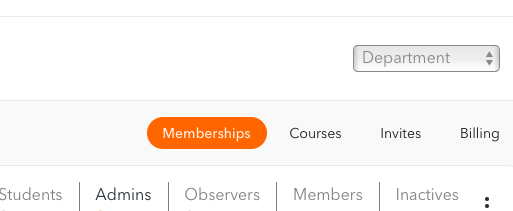
When you login and click on the Organization tab you will see there are now four buttons where you can filter out information:
Membership, Courses, Invites, and Billing.

Memberships: Lists the members of your organization
- Roles are clearly defined and filtered next to the search box.
- Students: These are the users who have accepted the invite and have access to the study guides.. You can see their name, email, amount of time spent studying, their last login, if they have an active subscription, and if they have access with a key, when that key will expire.
- Admins: These are the administrators for your account. Administrators have the ability to invite and deactivate users.
- Observers: This is a role you can set for faculty/staff who need to be able to view user data but not invite or remove users.
- Inactives: These are users who have had access in the past but do not currently have an active study guide subscription.
- Sort by any column - especially last name.
- Quick Expand of user profile by clicking on the arrow.
- Now have Study Time, Last Login and Subscription info for your review
- Subscription shows users who have access to the study guide regardless of who is paying for that access.
- Key expiration is the date access is set to run out.
- Download a .csv file with the information for your records
Courses: Allows you to view user information and progress in a specific course. You can also view the group of students in this course and even download a .csv file with the information for your records.
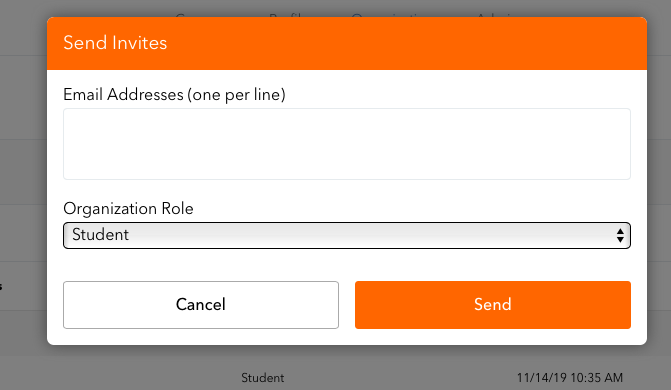
Invites: This shows the invites that were sent. It also allows you to see who has accepted their invite and when along with their role such as student or admin. You can now choose the role you wish the person to have when they accept the invite.
Billing:
- This new tab shows you who was given access under your program’s access keys. These are the active keys you will be charged for at the end of the month.
- This tab is now where you will deactivate a user. Select box to the left, program menu then Deactivate key
- A copy of your user list will be included with your invoice moving forward.
You can now sort each column by clicking on the title. To sort users alphabetically by last name you will simply click on the column heading “Name.” You can also sort by email, last login, or any other column heading. Try the new search box to quickly locate a user.
Clicking the drop down arrow to the left of a student’s name allows you to see every study guide that student is currently enrolled in. This gives you a snapshot of that student’s progress right from your dashboard.

Under the Courses tab, you can now sort by study guide. This will show you exactly what students are enrolled in a specific study guide. For example, if you need to know which students are enrolled in the TExES Core Subjects EC-6 Mathematics study guide, you can select that study guide and it will give you a drop down with every student who is using that study guide. You can also go to the right and click on the three dots to download and print a .csv file with all of that student information for that study guide.
The Invites button allows you to send invites to students and new admins. You can choose the role the person needs to have before sending the invite by clicking the options in the drop-down labeled “Organization Role.” Once they accept the invite, their role is automatically assigned and they will appear in the Memberships tab.
Under Billing, you will now be able to see who was given access via a program key issued from your account. By sorting out the active ones, you can now see which keys you will be billed for at the end of the month. You can remove access from any program billed student by simply clicking on the box next to the student’s name, clicking the action menu to the far right and then selecting “Deactivate key.” You can also export a report of all your keys from here. A copy of your user list will be included with your billing moving forward.
If your program is set up with members separated into departments by program billed vs. student billed, site locations, or academic department those are now even easier to navigate. A drop down menu can be found in the top right corner where you can select which department you wish to view. Once you’ve selected the department information can be viewed in the categories and invites can be sent according to your department presets.
- Send a new invite from your Invites tab to provide the user with additional access. Click the action menu, select the invite option and then enter the user's email address in the "Send Invites" field.
- A new invite email is then sent to your user. Once they accept they can sign in with the same credentials as before, adding additional access time to their account. Active users will appear under the Memberships tab once this process is complete.